Agustin Guerrero’s
Interaction Design
Reflective Journal
Semester 3
Entry Sixteen – Individual Essay (Interactivity – END)
Dealing or Working with Constraints? – An Analysis on the Value of Decisive Constraints
Introduction
The restriction or limitation of something can also be called “Constraint”. Many things can be constrained in different ways, like how a car can be constrained by the amount of gasoline in its tank, by the terrain it drives on, or by the amount of space it allows for passengers. And just like that, it is understood that us, the designers, constantly have to work around different sorts of constraints during our creative processes. Every new design will count on either a deadline, a specific budget, a kind of material, a medium, an aesthetic style or any other conditions that will limit how the designer decides to move the design process forwards. However, the term in which constraints are defined is wildly open, and has left for various interpretations as to what they act like for designers, and to what they force upon the design where they act upon.
In this essay, I will argue about how constraints, in design, can be separated into two different types, and how both types of constraints are different from one another, where one must be overcome by the designer, and the other can be of use to them. I will also like to argue about how these different constraints can and should be approached, both by analyzing previous work done in the Interaction Design Program and by reviewing terminology from different design researches.
Defining constraints from an Interaction Design perspective
The most common way to define a constraint would be to say it is “a limitation or restriction”. However, not all limitations and restrictions can be considered to be constraining the design process, it would be more accurate to say that, to a designer, a constraint would mean a restriction of their creative freedom and, or, a limitation of their design material and possibilities. An example of this could be, if the designer is requested to make their design at a specific place, with a specific set of materials and due a specific date, then their possibilities have been highly reduced, as they are free to work only inside of those boundaries. This is what Biskjaer and Halskov (2013) defined as “Incidental Constraints”, which is the term they gave to those limitations and restrictions imposed to the designer by somebody or something else, like a requested task or the nature of a material(s) they are working with. On the other hand, Biskjaer and Halskov (2013) also mention the existence of “Essential Constraints”, which, contrary to the incidental constraints, are imposed on the designers by themselves.
Constraints can be then separated in two groups, being one the “Imposed Constraints” and the other the “Intrinsic Constraints”. An Intrinsic constraint would be part of the design task itself, maybe as a material with its own set of properties, maybe as a deadline or maybe as a specific focus the design must follow. They are rules that the designer must overcome, but cannot change, it is bound to the nature of what is being worked with. While an Imposed constraint would be what the designer chooses as a limitation to work around, as they can decide to avoid certain terrains of design. But why would a designer want to self-restrict themselves at the time of working? What positive effects can this have for their work?
Dealing with intrinsic constraints
Starting with the effects of intrinsic constraints, or incidental constraints, comes one of the first tasks of our second year in the Interaction Design Programme. During most of the tasks of the programme, we had been imposed constraints by the teachers, such as the Pointlights task. In this task, we had to work with a single-color LED as our only output, and find how deep and rich it could be to use such a simple and common object for representing emotions or behavior. The whole point here being that we make the most out of the least.
Once we had started, we were left wondering about different aspects of the LED that we might not have considered if we had more at disposal. For example, even when the LED has such a simple look and behavior, can it show something complex? Are we able to represent movement, a feeling, an expression?My teammate and I found ourselves exploring more aspects of behaviors in different living creatures and activities, always looking for the small details that can give life to our LED. We constantly asked ourselves, how could the light go beyond switching on and off, to then feel like something else?
We understood that in some way, we needed to “translate” the actions or the feelings we wanted to express onto the LED, making them more basic, while still retaining their fundamental essence, what makes us understand them. Then, for our exploration, we started to make and analyze exaggerated expressions, such as loudly yawning and jumping from bed when waken up suddenly. Their over-expressivity helped us visualize their essential aspects easily to later convey that meaning on our LED light output. We used aspects of the expressions such as volume levels (yawning), movement speed and height position (jumping from bed). The light would increase and decrease its brightness according to it. The idea was that, through the blinking and fading of the light we could maybe express feelings or actions.
By the end we could see some form of those expressions we had worked on being reflected on the light. The LED felt alive, it had an “inner life” according to teachers and peers alike, that made it feel different than how a common light would. The whole process of working with those constraints felt as if we were making a wooden stool, but only had a medium sized plank. It was up to us to shape that plank into the stool, despite its limitations, and it was that need to adapt to the circumstances and explore the material in its most basic form that made us overcome the complications of the constraints. That need that the pointlights had, in which we have the need to minimalize expressions through their most basic aspects, is what guided our project from the beginning to the end.
Working with imposed constraints
After going through the experience of the LED pointlight task, we started to see some positive aspect from working in a constrained way, as the results from those more restricted tasks had ended up in nicely accepted designs by teachers and peers alike, while also leaving an impact on the way we had approached a material. In some way, in later projects, we started to constrain ourselves when working with known materials. One of these projects had a similar task to that of the single-color LED, but did not feel as constrained, as we now had the possibility of working with a much more complex output, that being an actual computer screen. In a way we were still dealing with intrinsic constraints, in the form of deadlines and a specific scope on the project, but the possibilities seemed endless at the start of the project.
The previous project made us focus on the main aspects of expressions and movements as a direct result from the constrained material we worked with. Now that we will work with movement, it may be a good idea to bring some stuff back from the LED project. Here is when imposed constraints came into play, as we had already experienced how the most important aspects of movement could be highlighted through the lens of simplification. My teammate and I discussed that if we simplified our screen output to something similar to the LED, we may be able to focus more on the actual feeling and meaning of the movement we perform. Which is why our decision was to take the movements we were detecting on the computer and translate them into a simple geometrical shape. We would have to shape the movements into an abstract visual representation that would hardly resemble the actual moving body. Through this exploration of movement, we expected to be able to convey the meaning of the body’s movements in a better way.
Since we wanted our output to be as little complex as a pointlight, we experimented by choosing various bi-dimensional shapes. These shapes would take our body movements and transform them into more simplified ones. The squares, triangles, curved lines and circles needed a feeling similar to that of the LED in the previous project, some sort of inner life within it.
We worked again with the sense of exaggerated movements and actions. There was the need to return to exploring the feeling and meaning behind the actions. At times resulting to the more powerful and exaggerated movements for both better use of our body detection program and also for carrying more feeling from those strong movements, as they were better for depicting the most crucial aspects that make the movements distinct. As we progressed, we felt how the body was “hidden”, somewhere within the shape.
Final reflections
Through the end of both projects, I took a pause and looked back at the experience from both design processes. When working with Intrinsic Constraints, the goal is to work around them and find out the best possible design choices within the frame of the given constraints. One cannot go beyond them, so the only option is to accept them and do the best within those limits. However, Imposed Constraints present a different approach to making design choices. One may have endless possibilities, and that can lead to an aimless look for what to do, which is what happened at the beginning of the second project. Here, one must create a path of their own, they must decide what stays and what is left out, and then proceed to work in the same way as one would with Intrinsic Constraints.
The difference here, is that the knowledge from a topic, material or situation obtained from dealing with Intrinsic Constraints is what later gives sense to imposing constraints on oneself for achieving similar results. Biskjaer and Halskov (2013), reflect that the use of “Essential” constraints depends on previous knowledge and experience after working with “Incidental” constraints, as they derive from () work, in which he concludes that, “Creative advances came about through the building of the new upon the foundation of the old. There was no wholesale rejection of the past, no “breaking out of the box”.” (Weisberg, 2006-2010, as cited in Biskjaer and Halskov, 2013).
It is understood that one cannot simply put a barrier in front of them and expect it to be helpful, as this self-imposed restriction has to be of some use to the designer. Perhaps dealing with some Intrinsic Constraints had a positive impact on the design process, but that does not mean that all the constraints present during the design process were helpful. Biskjaer and Halskov (2013) argue that there must be a direct connection showing that imposing the constraint will directly affect the results. “They must prove a direct, legible link between the intentional act of freely selecting paired constraints and the subsequent achievement of creative breakthrough.” (Biskjaer and Halskov, 2013).
During our second project, we identified that the simplicity of the LED was what led us to finding interesting aspects of movement and then decided to “copy” that constraint int the new project. We identified so by analyzing what we did right and what led us to doing so. It was not the time limit from the deadline, it was not a shortage in budget, it was a combination of the simplicity of our output material and our lack of knowledge on using it to its full potential.
Conclusion
In this essay, I have argued about why constraints should be considered from both the Intrinsic and The Imposed angle, as well as defending that it is once that we know, and understand how the limitations work, that we can decide when they can be used on the design process. Finally, explaining how this understanding is obtained through dealing with Intrinsic Constraints. And when the designer is left unleashed to create is that they go back to them, in the form of Imposed Constraints, to “decide” the path they will walk by themselves.
References
- Biskjaer, Michael & Halskov, Kim. (2013). Decisive constraints as a creative resource in interaction design. Digital Creativity. 25. 27-61. 10.1080/14626268.2013.855239.
- Weisberg, R. W. 2006. Creativity: Understanding Innovation in Problem Solving, Science, Invention, and the Arts. Hoboken, NJ: Wiley.
- Weisberg, R. W. 2010. “The Study of Creativity: From Genius to Cognitive Science.” International Journal of Cultural Policy 16 (3): 235–253.
Entry Fifteen – Final Touches, Presentation and Side Project?
Today we have done the last presentation of the third module and the final presentation of this course. Up until this morning both my teammate Karin and I have been trying to make some small changes to the code, such as the previously mentioned «shape size adjusting», but to no avail. It didn’t matter too much in the end of the day, but it’s something I personally felt was going to be a great part of the project. Regardless, we did do some other small changes in the last few days. The bottom part is now moving differently, taking the distance between the feet instead of the distance between ankles and hips, the color scheme is also different (just for aesthetic purposes, we wanted «stretchy» colors, and pink and yellow remind me of bubblegum and rubber respectively), and finally, the shape leaves a trail of its previous forms, which fade over time (we wanted to show how the shape «remembers» its changes and how that can affect the form it used to have in the beginning. It’s a simpler version of the «adjusting» we weren’t able to do).
During the presentation we had the feeling our design was liked, and had potential to be interesting, to the point where some teachers suggested we could work on it as a side project of some kind. Maybe taking an actual, physical material and manipulate it using robotic arms, which could be controlled with our body position like in the code. It did sound very interesting, but just as the case in M2, we are now expected to move on to finishing this journal and writing the final essay of the course, so it will probably be left at that. However, it would me much easier to go back to it if we wanted, as we have dismantled the designs from M2, but the one in M3 is a code we can go back to at any time, and perhaps we do.
One last thing to have in mind, before closing the book on this chapter of the journal is that, during the presentation the teachers mentioned how I focused more on giving a technical explanation of the design instead of a reflection on how it was supposed to make us feel. It was still somewhat mentioned and also visible in the material we showed. But for the sake of giving full closure to this course, I will make a short, different version of that part of the presentation where I instead talk about the more «reflective» part of it. Here it goes!
What the design is supposed to express and make the user feel
«Most of the idea behind the shape is meant to be seen as an external body to ours, or perhaps a different, more abstract representation of our body. It is meant to show how we can push the limits of each different part, and how each one can indirectly affect the other parts too, and thus, the overall shape. It is also meant to be showing how us affecting the shape’s size and form has an effect on it, which makes it feel like how our clothes is permanently enlarged after being stretched enough. Finally, the shape tries to show the user a different depiction of what that stretch feels like, elastic, powerful, and so weird compared to how it normally is. If we stop and think about how weird our body looks when we stretch (we sure have, after testing this model for over two weeks) we will see how the shape also reflects that weirdness, in the form of a strangely drawn, curved shape.»
The last thing that remains to do now is finish the essay alongside this last entry of the journal. The semester was surely uncommon, stressful at times and also very enjoyable, more so than many of the previous ones. I feel as if I did learn a lot from past projects now, and how it helped me develop my ideas better in these last modules. I look forward to the next one with lots of excitement.

Almost final shape (Changes in code)
Oct 30, 2020
Entry Fourteen – Stretchy Shapes and The «Abstract Body»
Today it has been a week since the last entry. I decided to update after we had a new teacher coaching session with something more substantial to say besides updating on our process, since we did a lot and very little simultaneously.
Quickly summarizing what happened in the last week, we had tried to make different new shapes that would behave to what our body part’s stretching was like. We wanted to see how it was to see new, different representations of our body in an abstract way, which is something that I forgot to mention in the previous update. Not only the teachers, but our fellow classmates found that the way in which the shape «feels like a body» regardless of how simple it is in comparison was a good thing. They mentioned how you can still «see» a body in the shape, how it reacted in the way you expected it to, and how in its simplicity it still has some level of complexity in its movements, as if it was both alive and not alive at the same time. And since my teammate Karin and I always saw this shape as an elastic object we «manipulate» with our movements, it was great to hear that the feeling was something most of them also saw in the same way as we did.
The new shapes were also very interesting, they still felt similar to the first shape we had done, but they all had a distinctive feeling that separated them from each other. Still, we are not planning to continue them for the final presentation. Why so? These shapes have been a it hard to work with, being as abstract as they are, it is complicated to find a way to get a «satisfying» response from the shapes. Some are lines, some others are more simple shapes and they all work differently from each other. So them we thought that given the time we have remaining we should stay with the second design (the prism) as it felt like the perfect balance between being abstract, but not too abstract. Unlike shapes like the lines or the rectangle, we identify the body easily in this shape and it reacts in the way we expect it to. We got the same commentary from peer classmates, but some teachers still found them interesting, though they agree that maybe it is a better idea to work on the one we feel more comfortable with if we have little time for the others. Even if the plan is to «abandon» the other shapes, we will still acknowledge them in the presentation as a «possible new iteration» of the same design.
Alongside this, since Karin was the one mainly focusing on those «new iterations», I was instead improving the other design as well. We now made the lines become curvier to the inside or outside depending on where we are stretching toe body part to. It also works depending on our height, becoming flatter when we lower our height (this was present before, but it had issues and are now fixed, making it easier to see it on the shape) We had other ideas in mind which I will probably try out in the next few days (having the shape slowly adapt to a new size after it is changed), but I haven’t been able to so far. We have one more coaching session before the presentation, and we feel very confident with what we have, but if we can improve it more then we definitely want to do so!
Current shape attempting to slowly adjust
(Not working)
Current shape instantly adjusting 
New shape #1 («Snake») 
New shape #2 («Snakes») 
New shape #3 («Waves») 
New shape #4 («Abstract Stick-Figure») 
New shape #5 («Net») 
New shape #6 («Triangle»)
Oct 27, 2020
Entry Thirteen – Stretching, Enlarging and Contracting
Today we have come up with some ideas we want to play out with regarding the stretchy movements. So far my teammate Karin and I have had two teachers commenting on our project, which I will come back to later. For now I will summarize what we worked on during the rest of the week, the weekend and the last few days of the second week.
As of today Karin and I have done one small experiment and a bigger one, which is an evolution of the first. We started by wondering what would it be like to have an object be altered by our «stretchiness», something rather simple, a ball that becomes big when we stretch our bodies to the max, and it becomes smaller when we contract them to the max. We had this done last week, and it is basically taking our main four limbs: arms and legs. To test the «stretchiness» of these limbs we tried by testing what was the maximum distance we managed to achieve from the starting points (shoulders or hips) to the ending points (wrists or ankles). We then added all four values (distance between both wrists to shoulders and from ankles to hips) and thus we made an estimate on how «big» the body could become. Then we made the same but for the opposite, the closer we could get the parts to each other, and then we had made both estimates for how contracted and how stretched, or expanded, the body could get. We then used it to alter the radius of a circle on the screen, which would become bigger and smaller according to our body stretching. With this we could play around by having all parts contracted and stretched, but also just some of them stretched and some contracted, maybe even half way through. This added some playfulness we had wanted to be present in our design.
But this felt a bit boring after a few minutes, it only allowed us to make it bigger or smaller, and thus it stopped being playful quickly. We needed a new idea. And so we did.
The second design is one we plan on developing as much as we can on the current week. It was endorsed by both teachers who we presented it to and is showing to have some interesting potential in it. The premise was simple, evolve the enlarging ball into a more playful, complex version of itself. We expanded the way in which it behaved by adding separate sides to it, so instead of a ball it is now a prism, or rectangle of sorts. Each side is moved by the corners, which at first followed our «ending points» (wrists and ankles). Karin and I quickly decided this was a bit of a trap, since we would be making a mirror of out body by having it move to our exact same position. So after an intense session of coding we had finally managed a way to make the movements of our shape, much, much more abstract. It was now making the corners be created on positions relative to the center of the screen, proportional to the distance between each limb. So now each corner follows a different limb, like before, but not exactly in the same way. It would only move in diagonals from the center, not vertically nor horizontally. This was more or less what the teachers had expected, which is why they then proceeded to encourage us to try new and more interesting ways of testing these methods. What if we had a different shape? Or what if it behaves a bit differently? What if it is more exaggerated? What else can we add to it to make it even better?
It seemed as if we were doing incredibly well, something I am not so used to. But I am not complaining! We have another week and a half to continue on with the project and it feels like we are on the right track. Even when I am struggling with certain aspects of the code, it has been very intuitive to work with, and more enjoyable too. By the end of the week we want to have some more examples to show and then dedicate the last week to polishing and finishing whichever design(s) we like the most.

Early sketches (How is movement going to work?) 
Early sketches (How is the shape reacting?)
Oct 20, 2020
Entry Twelve – Body Detection and Machine Learning
Today we got feedback on what we have been working on for the last few days. Module 3 has already started and everybody is already working on figuring out what to do, including my new teammate and I. Our new task is to play around with a body detection code made on JavaScript and then find a way to interpret different body movements, how they feel and what they represent to us. Also having in mind how working with machine learning can be useful, as it is not simply following exact orders, but instead coming up with an understanding of many examples, creating an algorithm that helps it understand a more abstract concept. Such as the one we are using now, we are using the algorithm for body detection as the input for our project, and our task is to create an output that shows how the computer represents those movements, but in a more abstract way.
We are still figuring out exactly what we plan to do. Even when we know we are heading somewhere close to the stretching movements, we still need some specific focus to drive the project forwards.
After talking to one of the teachers it was made clear to us that we are not supposed to merely create a «copy» or «clone» of our movements on the screen, but rather make something more abstract, even playful, something that would invite the user to try thing out with it. The example the teacher gave us was quite interesting: «When you give someone a paper and pen, it is like inviting them to draw different things; but giving them a pencil and a photograph isn’t as inviting, is it?». I interpreted this as if we are creating something where we invite the users to try out different movements, poses and gestures, but not by making a mirror of them, but instead an extension of themselves, or a different representation that would not be as clear or understandable.
Before today’s coaching we had ideas such as having the body switch parts, and the users having to figure out which body part was positioned where on the body shown on the screen. Or even making some parts move to the wrong direction (up is down, left is right, etc.). But this was proven to be rather boring or without sense, as that is as deep as the experiment would go. We wanted something better.
We plan on developing our ideas more throughout the rest of the week and try to come up with something better for Friday’s coaching. We did, however, try several things with the code today and on the las few days, and surprisingly, I am liking it. Maybe it is how intuitive I am finding the code this time around, or the fact that it is smaller and easier to work with than the one in M1. It has been a lot of fun just creating thing in it and I feel confident that I can find a way to create anything we think about during the week, as long as it is simple. Some of what we did was just for testing how we could use the code, such as a «drawing with the nose» example, a «twister game» where we used our feet or nose, and an «enlarging ball» which is just following two parts and altering a shape according to the distance between them. Probably some of these will come back in the future as a helping mechanism for something bigger. I hope so at least.
I will have in mind how the results were in M1 after struggling with the code for weeks without thinking in what we were doing with it. So now I am leaving the code aside until next week, now we are focusing on finding out an interesting topic related to stretching to work with.
Part of what the teacher finished the coaching with today is that even if stretching is interesting on its own, perhaps we can also see the other side of it. What about contracting the body? What if we explored what it feels like to have the body stretched to the maximum and contracted to the maximum. Kind of like testing the limits of the body. We really liked this, and it will probably be related to what we come up with next week. Hopefully we make everything right this time around and don’t struggle with the code.
Oct 14, 2020
Entry Eleven – Reflection on Design Unification and Photo Session
Today we presented both of our designs, and we got to see what our peers have been up to as well. This time I was surprised by the end of our turn on the presentation, as I always expect some sort of «mistake» or «blind spot», something I did wrong or I should have done better. Instead, this time we met something different from the teachers response to what we presented. A challenge.
We had at some point in our design process, thought of combining both the waking up and sleeping lights into the same code and have it be one design instead of two separate ones. In fact, both of us had designs like those at the beginning of the second week. But somewhere in that time we thought that we should split them and work in each one individually but giving each other support and feedback. Our reasoning here, or, at least mine, is that when I have a teammate and some of us struggles to do something, we split the work so that we all work in what comes best to each individual. That was not the case here, as we both felt comfortable coding, helped each other at times with small code-related issues and both felt confident in what we designed and developed since day one. Which is why we thought working mostly on our own would benefit the overall result, we wanted to experiment somewhat freely and push each other to do a batter version of our own designs, and it could have been problematic to try and combine the ideas since we had such separate approaches to both of them.

Final design – «Wakey Light» (Dark #1) 
Final design – «Wakey Light» (Dark #2) 
Final design – «Wakey Light» (Dark #3) 
Final design – «Wakey Light» (Dark #4) 
Final design – «Wakey Light» (Dark – Animated)
But by the end of the day, we were encouraged to reflect on something. What if we combined these two designs? How would we do it? And how would it be like to do so? Not by saying we should have done it, but instead by having us thing about the challenges of doing so. Would it be better? Worse? Hard? Easy? That was something I wanted to figure out.
Of course, we had no time to do that now, since the new module is starting next week and we both have already completed that part of the course. But for the sake of it, here is my reflection on how we could combine the two designs we showed today into one super-light-design!
Reflection on the combination of two designs
«Personally, and taking into account how similar our designs are code-wise and in terms of the tools we used (LED and two different sensors) the biggest challenge would have been to adapt them into one shape. The biggest difference between both designs was that the one made by Karmen is a larger body with a minor focus on the light, and mine was a bigger light with a minor focus on a body. However, it is rather simple to know which one to choose given how our tools work like. Karmen’s design has a need for the body for hiding the light sensor located on the top of her structure, this would be harder to do with my design, since the acrylic is half transparent and would need piercing for the light sensor to be in the top, which would ruin the acrylic’s purpose in being a clean surface for the light to bounce on and reflect more. One could argue that the sensor could be located elsewhere, but personally I believe it is a smart idea lo locate it there, as light is more likely to be above the shape rather than on the bottom or on a side. Besides, it would not be hard to adapt Karmen’s design in order to have the pressure sensor under the main body and add some elastic/mushy/bouncy element as well, just like a resort, a piece of cloth or Styrofoam for the body to barely touch the sensor. We could activate it by holding the top part (without covering the light sensor) so that it would activate the pressure sensor and thus have both sensors working on the same body and from the same position!
Code-wise, it would not have been hard to copy paste the states of one light to the other and code it so they don’t collide with one another, as each sensor still triggers its own set of states. This lets us keep working with only one LED, as we are expected to.»
There could be many aspects of it I have not considered, but that is what I would have worked on if we had more time to develop that pair of designs. After the day was over I headed home and took some more pictures of the light design before scraping it, possibly, forever.
Next week we are going back to JavaScript, and considering the last module I can’t avoid but to feel afraid of it. I hope Arduino has helped me re-familiarize with code and make it a bit more simple to me when the time comes to work with JavaScript again. For now, I will stay positive and remember to have the code as a secondary thing to actually reflecting and developing an idea instead of making it work on code first. Wish you luck future me!
Oct 9, 2020
Entry Ten – Final touches, testing and refining
Today we have completed our designs for the LED lights.
Karmen’s design has now the light sensor working on top of the cage shape, while the LED light lies on the center of it, shining its light through two holes covered in acrylic circles, like windows. The activation method in now by placing the hand on top of the cage, covering up the sensor and having the light slowly fade until it is turned off. The process can be interrupted by removing the hand before the light «falls asleep» and thus will make it wake up again.
My design in also completed, having now a finished base shape that hides the Arduino board and cables and also holds the acrylic prism on top of it. The LED reflects on the acrylic, making it more visible and giving it the feeling of the light being the acrylic itself. The pressure sensor was incorporated to it as well, being hidden underneath the acrylic and the base, connected and fixed on top of the Arduino board. The idea behind this is that the acrylic prism can be held and pushed downwards in order to apply pressure onto the sensor, making the light react in the two ways it is supposed to. If the acrylic is pushed downwards gently for several seconds the light will slowly start to gain its power back, bouncing between being fully powered and at times losing some of the power, symbolizing the waking up process where we slowly gain consciousness over our mind and body at the same time. After it has finished the light will be fully turned on and will go back off if the acrylic is removed from the base, as a method for restarting. However, if the acrylic is pushed hardly or simply smacked on the top, it will make the light quickly go back on, blinking slightly, symbolizing how the waking up process was rushed and ended up ruining the quality of the sleep.
We are both quite proud of our designs are plan on refining some small details on the early hours before the presentation tomorrow, as well as doing some more testing and probably take footage of it in to make sure we count on something to show in case the code fails. I feel ready both ready and excited for the presentation, as I have seen little of what others have been doing in our class.

Final design – «Wakey Light» (Light – Animated) 
Final design – «Wakey Light» (Light – Animated) 
Final design (Karmen Saare’s) – «Sleepy Light» 
Final design (Karmen Saare’s) – «Sleepy Light» 
Early «cage» design – «Wakey Light»
Oct 8, 2020
Entry Nine – Unification of Input & Output and Design Re-design
Today we got some extra feedback from two of the teachers regarding our advancements in the design of both sleeping lights. My personal design and my teammates design are both almost completed, as both codes are working properly already. Regardless, we are planning on taking the criticism given to us today as an opportunity to improve the designs in the following days. Since both designs still feel as if they have an on/off mechanism, even when the behavior is not as binary, we came to the conclusion that we should dedicate our remaining hours of work in the workshop to try and come up with a version of the lights that feel different to manipulate.
My teammate, Karmen, has been planning to work with a shape that would either reflect the light of the LED onto a surface with a shadow cast into it, which would make the light of the LED much more visible; or; instead have the LED be surrounded by a material, leaving only one area where the LED would be visible. The main purpose of adding this «box» or «cage» to the LED is to have the activator for her LED, which is a light sensor, combined with the LED as the same artifact. Trying to hide cables, the Arduino board, and everything else that is not crucial to the interaction we are displaying on the day of the presentation.
Her design inspired mine in a different way, as I am also following the idea of surrounding the LED to increase its visibility, but instead of having it trapped in a cage, I wanted it to be its own body as well, but emphasizing more on the light itself. While Karmen’s design could be taken as a light trapped inside a cage, symbolizing how the mind fades away inside of the body when we fall asleep; my design tries to show how both the mind and the body are put back into action, displaying a connection between the two as the same thing, since they synchronize when we wake up from our sleep.
For this I planned on encapsulating the LED in a small table-like piece and have the LED cast its light upwards into a tiny acrylic prism. The acrylic will highlight the light while the other piece will hide the board and the cables, alongside the LED itself.
By now we have both finished the code part of the project and plan on working for the next days on those changes. Both her design and mine have moved on from working with buttons and are now functional with a light sensor in Karmen’s case, and with a pressure sensor on mine. After the design is done we plan on incorporating both of them onto the very shape, making input and output be together in a more aesthetic and organic way.
Updated «Sleepy Light»
(by Karmen Saare)Slow «Wakey Light»
(Testing reflection)Fast «Wakey Light»
(Testing reflection)
Early sketches #1 («Cage») 
Early sketches #2 («Cage») 
Final sketch (Reflective body)
Oct 6, 2020
Entry Eight – Animating the Unanimated and Sensor Experimentation
Today, after a couple of days of work, the light finally looks smoother. Not only that, but it also properly reacts to the button and switches between states smoothly.
After getting my hands on a light sensor I started to play with the different light values and managed to get the states to change according to the light levels instead of doing so with the button. So far it goes from being awake to falling asleep and then being asleep, and from being asleep to waking up, yawning a little and then being awake. The plan was to add a second version of the waking up that would be quicker and have lots of blinking instead of a yawn so that it would feel less relaxed and more stressful. But before that, my teammate updated me on a little chat she had with the teachers, in which they suggested we could «interrupt» the falling asleep and waking up processes with the sensor. Kind of how a bright light not only wakes you up, it also makes it harder for you to go back to sleep.
So I decided that the sudden awakening could wait a little (even if it is already been done in a previous code) to instead work on interrupting the falling asleep and waking up processes. In no time this was working wonderfully and gave us the sense of it being much more playful, interactive and realistic. It felt as if it was kind of a real creature that has its own behavior, which is only altered by its surroundings, which made us think that something really interesting could be found here, and we will waste no time in exploring it in great depth in the following days.
The plan by next week is not only to finish the «Sleepy Light», but also to explore what else could it be reacting to. Maybe temperature? My teammate is about to start exploring the use of a temperature sensor on top of the light, and visualizing a combination of both heat and darkness would allow the light to sleep, and the lack of any would make it wake up, possibly in new, interesting ways.
My goal for the weekend is to have the Sleepy Light working properly with both waking up versions and the sleeping, all connected to the light sensor. Maybe even creating a little area that would allow me to work easily with the amount of light, perhaps we could do something like it in the workshop next week. But for now, I’ll keep on working during the nights inside my dark, lightless, cave of a bedroom.

Serial Plotter (Sketch) 
Serial Plotter (Sketch) 
Serial Plotter (Computer) 
Light Behavior (Wake Up Slowly / Fall Asleep) Early «Sleepy Light»
(by Karmen Saare)
Oct 2, 2020
Entry Seven – I’m tired and so is my light
Today I made more progress on the two light behaviors we discussed on previous days. Both my teammate and I have explored how the light could «Walk», «Sleep» and «Wake Up» in different ways.
For example, the «Sleepy Light» is now much smoother both on how it wakes up and how it walls asleep. The waking up is now slower, as it is representing a more normal and calm way of waking up whereas the previous one was a more sudden way of waking up. The «Walking Light» was also improved a little, but after a short talk with the teachers and going back and forth with the idea of having a light that looks like it moves closer and farther away, we ended up deciding to leave it there. It did not feel particularly special and did not seem to lead anywhere as any suggestions we made towards evolving it ended up sounding like concepts rather than an interesting exploration.
The «Sleepy Light» on the other hand is evolving rapidly. My teammate and I have been discussing the possibility of trying different ways for the light to wake up, try improving the small details in the behaviors and also trying different, more interactive approaches. For example, we are talking about using a light sensor that should put the light to sleep when the lights are off and make it wake up when the lights are back on. Maybe even having the type of waking up change according to how much light is received (more light will make it wake up quicker, less light will make it slowly wake up). We even discussed having the light yawn when it wakes up and also make it blink more.
During this week we should try at least some of those while also looking for something more interesting that could be explored through the «Sleepy Light».
First thing for me is to make the light’s behavior smoother and more flexible so that it is not attached to a specific timing, but could be altered by an external factor, like the light sensor. Second, as I do not have my own light sensor I should try to make the light go between being awake, falling asleep, asleep and waking up with a button. If I manage this it should not be hard to translate it to the sensor. Once I get all of this to work I will see, alongside my teammate, how it could be a bit more interactive.
Sep 28, 2020
Entry Six – It’s ALIVE!
Today we made more progress on the previous ideas, plus, we added some more on top.
My teammate and I have been focusing on working separately on each different idea we come up with, but discuss it together after it is done or while on the making.
Three days passed since the previous entry, and the two previous examples were polished a bit in order to become more «experimental». Both the «Heartbeat light» and the «Sleepy light» examples got a knob added to them, which allowed us to tweak the speed in which the action was being performed. The Heartbeat light would simply do everything faster or slower, making it look as if the heart pumps blood quickly or calmly; while on the other hand, the Sleepy light would wake up in a rush or more calmly but will always fall asleep slowly, which makes it a bit more realistic.
Not only that, but some other examples were developed as well.
Starting up with the «Increasing & Decreasing light», which would constantly blink at the same speed but will slowly become brighter or dimmer after each blink. This light was just a small experiment in order to test what could be done using Arduino, but ended up inspiring a different version of it which could simulate something getting closer or further away without having to move.
Next comes the «Sobbing light», which was directly inspired from the Sleepy light, which by somebody seemed to be crying instead of falling asleep and waking up suddenly. This light was supposed to represent a crying person, which would breathe in and sob a little before breathing in again. It is not too different from the Sleepy light, but it does make changes on how the light behaves (the sobbing fades the light away slowly and repeats itself four times), but also stays in a rather low intensity of brightness, which is supposed to make it feel more gentle.
Last and least there is the «Hello light», which was also just a simple test and didn’t lead us anywhere. The idea was for the light to say «Hello» using morse code… that’s it. It could come back later on and become a bit more important if experimented more on, but I doubt it will. So for now it will stay as it is.
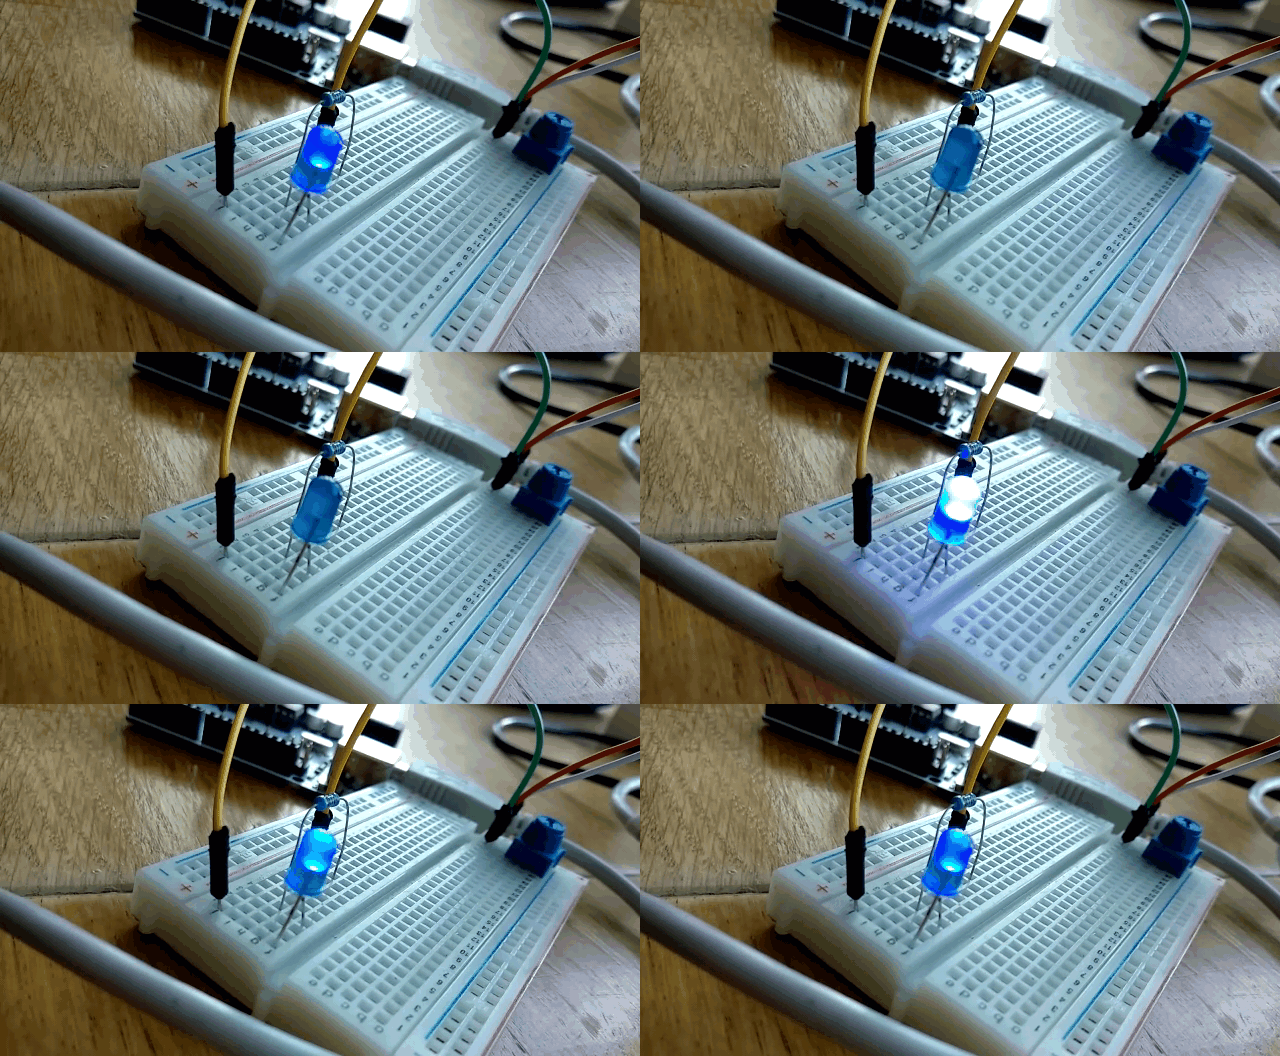
Fast to Slow Blinking Light 
Heartbeat (Normal) 
Heartbeat (Faster) 
Sobbing Light (variation of Sleepy Light)
Sep 24, 2020
Entry Five – Arduino and the single-color LED
Today we started the second module of this semester and went back to working with Arduino boards. After our new teammates were assigned we were given the task of experimenting with different behaviors we could represent using one LED as our only output. RGB LEDs, multiple LEDs or any sort of «complex» output were not allowed, only a single-color light.
We got to work immediately and started to get familiarized with the code again. It has been much easier to get used to Arduino than JavaScript, which makes it a bit easier to get things to work.
So far my teammate and I have made a couple of examples after about two hours of experimenting, yet we are still looking for a place to aim for during this week before jumping into exploring a specific idea more.
The plan so far is to look for different examples of movement, reactions or even emotions that we could translate into a blinking light.
By the end of the day I had finished two very basic ideas for what the light could be doing:
First, it could imitate the movement of a heart, by making the brightness of the light become higher and lower, fading between on and off while following the average rhythm of the human pulse.
Secondly, it could also imitate a person falling asleep. More precisely, I tried to imitate the way someone tries not to fall asleep. For this I made the light slowly fade off, with a little pause before being completely off to make it seem as if it wanted to stay on. Finally, after fading off completely it would take it half a second before it suddenly goes back on, blinking quickly in the process, as if it was making an effort in order to stay on (kind of how we blink repeatedly when waking up).
Even if we are still talking about trying to have the light behave in a «moving» way, as if it had a movement of its own (dancing, running, etc.) we are contemplating the possibility of dropping movement completely and focus more on what is «invisible» or simply not a physical movement, both as a way of simplifying our work and also as a constraint of some kind, it may push us to look at something a bit more complex or more interesting. The plan for this week is to keep looking at more of these short, simple examples and try to find something interesting to do with them.


Sep 21, 2020
Entry Four – Sound behavior presentation
Today we have presented the results of our coding sessions and also got the chance to see what everybody else had done as well.
Needless to say, our code was not really good. It worked, but didn’t get to do everything we would have liked for it to do. Some parts of our thought process had to be explained by us and could not be really seen in the code, like how we could have an element with its own behavior and how it could be changed or be acting accordingly to what we did, kind of as if we influenced it rather than control it.
It was not a disaster, I felt as if most of my classmates were also a bit lost regarding the code and had put most of their effort into making the code work instead of figuring out why they where doing it, as we had done too in my team.
We did not have a reason for the code doing what it did besides «experimenting», and it showed. I blame it on me for focusing only in making the code work without spending time on reflecting upon it. Definitely something to be careful about on future projects.
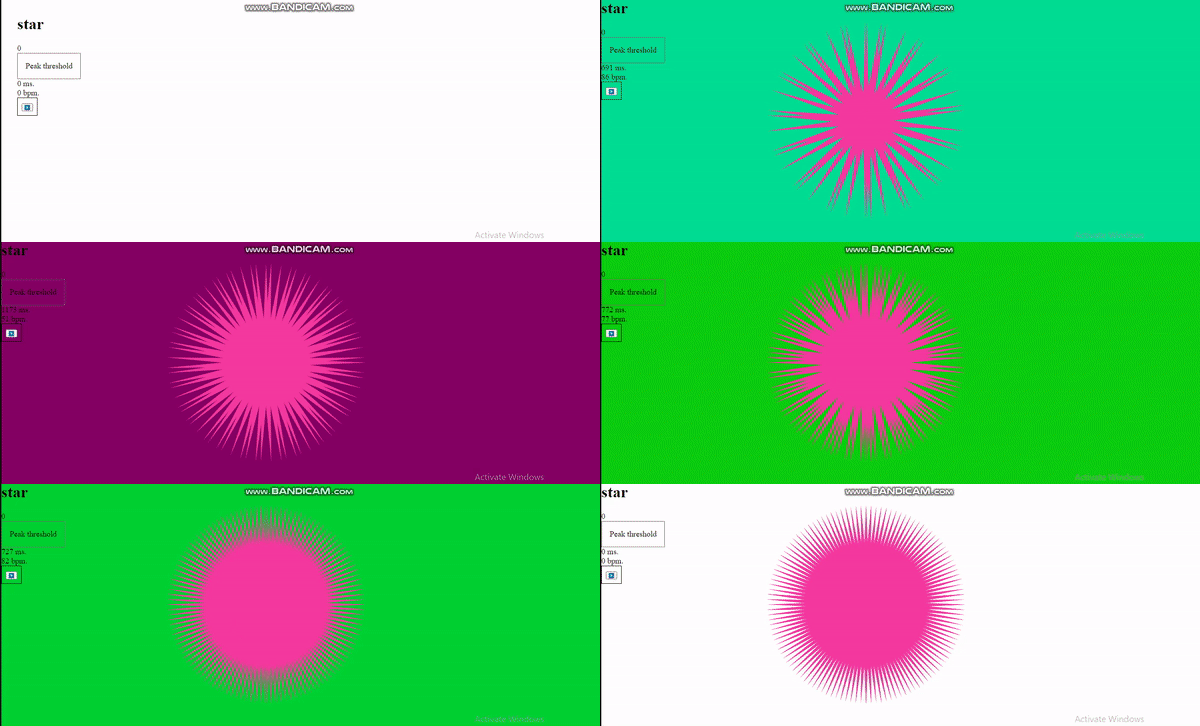
Our «final» coded shape was meant to be a «Rotating Star», which had to work just like the Rotation Cube from the last entry. And while we fixed some of its issues, it still didn’t work as it should. The star was overwriting on top of itself and even when it was meant to speed up, it kept the old start around too, making it impossible to see what was going on. We did explain how we expected it to react to the amount of sound, and got comments regarding other areas of sound besides the volume.
In the next module it seems that we will be using Arduino again, which is a relief considering I am much more comfortable with its code than I am with JavaScript. It should be much easier for me to reflect on things before, while and after I code since it is not so much of a burden as it was in this module. Looking forward to it.
This entry was edited with help of Priscila Silva’s Design Journal: Module 1: Audio | The P-word by Priscilla (wordpress.com)
Sep 18, 2020
Entry Three – Sound Testing and Video Presentation
Today we are presenting the videos we did this week to the class. After about a week we have made some progress in both the video making and the sound code. First, the video.
We went for the cash and credit card idea, which, felt a bit messy after the presentation was over. Many did not seem to get what we tried to make. Our take was that of two people trying to purchase an item from a store, both would try to pay by cash and it will be declined, but one of them manages to pay using a credit card. The idea was that, here in Sweden, most stores, work using card payments instead of cash payments. In this scenario, the credit card would be something reliable to pay with since it is accepted in pretty much all stores, while cash is more unreliable and can be declined in most places.
After getting the critique, we noticed about how we had focused too much on following the definitions from Lenz et al. instead of the interaction design aspects of constant and inconstant. Maybe, we could have had more than one example as well, since most of the teams presented plenty of short examples in their videos.
After the class ended, my teammate and I sat down and discussed about the presentation. She expressed to me how «a better idea could have been to illustrate constant by engaging with a functional card reader that would accept all types of cards every time, while inconstant could be the same machine only accepting certain types of cards (for example, credit but not debit; master card and visa but not American express, etc.)«.
In a way, I kind of regretted not using one of the ideas I had. I had thought about how in some videogames you are asked to make a quest and are told what you will receive after you finish it (a specific amount of money, of experience and maybe a specific object), while enemy loot on the other hand, is randomized, and can give different kinds of money, experience or objects, or even give none of it at all. Finishing a quest constantly gives what it says it will, making it a reliable way of getting that of what you wanted, while enemy looting is not reliable at all because of how inconstant their drops are. I thought it might have been too complex and too nerdy for the presentation, but who knows, maybe I should have mentioned it. Oh well.
Now back to coding! Up to now, my teammate and I have tried to understand the code and change the different values in it to understand the different reactions it has on the display playground, while also testing on it with some tune and sound making apps in order to see what sounds could be interesting to work with.
We managed to understand parts of the code and played around with shapes that get affected by sound, so our next step is to make our elements in the code get some kind of behavior, which will then be affected accordingly to how the sound is behaving as well. Perhaps we should try to experiment with different materials to make the sound as we are at it, but the sound apps we found so far seem to be enough for now.
From the examples, «Big Counter» and «Enlarging» are pretty much the same thing, only in different representations. The Big Counter example tries to count up one number every time the sound threshold is reached, in the example it is done by clapping. In the Enlarging example we increase the size of a ball every time said threshold is reached. However, «Sound Waves» try to react to the volume amount in both bars and circles. We wanted to play with traces too (red circle). Finally, «Rotation Cube» is not working as it should. It tries to change the behavior of the cube when there is sound detected. The cube should rotate and increate its speed depending on how much sound there is, similar to the Sound Waves example. The problem is that it overwrites every time and messes everything up, we plan on fixing it before we present so that it actually looks like it should, maybe even go beyond it. But for now, the plan is to have the object behave on its own and change that behavior with sound.

«Big Counter» – Clap counter (first iteration) 
«Enlarging» – Increasing size (second iteration) 
«Sound waves» – Representing sound 
«Rotation Cube» – Not working yet
This entry was edited with help of Priscila Silva’s Design Journal: Module 1: Audio | The P-word by Priscilla (wordpress.com)
Sep 7, 2020
Entry Two – Sound Coding and Video Making
Today we were assigned a new small task on groups, we were given two opposite terms and we are meant to display them in video format. My team went with Constant and Inconstant, which seemed simpler at the beginning. At first, we assumed something constant is something that always happens and that inconstant is something that sometimes happen, it was not the case. We weren’t completely wrong, but we did have to work with different definitions of these words. Something constant is something reliable while something inconstant is often unreliable and can lead to distrust and uncertainty.
An example given by the teacher at the end of the class was something along the lines of: «Doors here at the university building all work pretty much the same as all doors, they can all be opened like regular doors do, but some may ask you for a keycard and a code to open them. So, what is constant is the action of opening the door, but the fact that it may let you open it or not is inconstant.»
We are already having some ideas on what we could possibly do with it, so we will probably have it done in a few days.
One of them is almost completely discarded, since it was from our initial understanding of constant and inconstant. We had thought of lights and took the dynamo-lights from Priscilla’s bicycle, as we need to constantly give them power by cycling. Then we also took regular switch lights, as they do not require constant effort from our part, only one push to the trigger.
The other idea, the more accurate one, had more to do with the example from the teacher. We had thought of payments, more specifically, the use of credit cards. Much like the example we were given, all stores get payments from customers, but not all of them accept cash (in Sweden). This made us think about how credit cards can be more reliable in Swedish stores than the use of cash (or the use of Swish). In this example, credit cards were “constant” as they are meant to “Create a feeling of security” (Lenz et al, 2013, p. 135), and cash was more “inconstant” as it is often “Unreliable, creates suspense, you can’t adapt yourself to it, chance as an idea generator” (Lenz et al, 2013, p. 135).
The plan is to refine these concepts a bit more, or even come up with a new one for the video presentation day. Yet we took a small video of me powering the bike’s light as we may use it in the future.

While we refine the concept for the video, we have also been working on the coding class, and… it is stressful. JavaScript was either harder than I remembered, or I became dumber since the last time we used it. I forgot most of what it worked like which is giving me a hard time to work. Luckily, the teachers have helped us a bit on understanding this new code, but I may need to ask some peers or personal friends for help if things go this way for much longer.
So far we were given a code that displays the audio recording of our computers in different ways, such as volume bars and sound waves, which gave us some ideas we want to try out. Still, it is hard to work with it, and also the fact that neither me nor my teammate have any knowledge on sound-related concepts, so we are stepping into unknown territories. So far we did not have a goal, but according to the teachers, the best way of becoming more familiar with sound was to play around with the code, find out what it can do and what can be interesting about it, so we sat down and tried to make some sort of objective for the week.
One of the ideas we have so far was to simply make an object in the canvas and make it both change size and color depending on how sound is behaving at the moment. We still need to find out what in the code can be used to do so, but some of our peers work on stuff similar to it, so it must definitely be possible to do it.
This entry was edited with help of Priscila Silva’s Design Journal: Constant-Inconstant | The P-word by Priscilla (wordpress.com)
Sep 2, 2020
Entry One – Third semester and Journal peer feedback
Well, hasn’t it been a while? Today we are back at it with Interaction Design after three months of self isolation. Now having most classes via Zoom but with the possibility of joining my peers in the classroom, it feels as it will be a good semester overall. Our first task has been mentioned already by the teachers and the teams have been assigned. But before going back to that we were given the task of commenting on our teammate’s journal as a way of giving feedback to each other, so here it goes:
«Priscilla’s Journal does a pretty good job at displaying what has been done in each of the different projects commented in it. Not only by describing many aspects of what was done in those projects, but by showing many different pictures, videos or gifs, which at times were taken directly from the work they were doing and sometimes added on top of it from another source. This imagery not only gives a better understanding on what is going on with the text, but also shows the progression she went through in each project.
She also does a great job at describing her and her teammate’s thought process throughout the different projects, which makes the upcoming entries and the pictures in them much clearer to understand. While reading I can follow their reasoning and comprehend why they decided to take the decisions they took.
The one thing I would have liked to see more in this journal, is some sort of time commentary. As there is pretty much one entry per project (about one per month) it is hard to know how much each part of the project took, even when it is possible to know the esteemed time it took for the entire project to be done. Knowing if some prototyping development took hours, days or even weeks is something I would have been interested in knowing while reading; maybe that’s something to look into?
Overall, great journal. Detailed, well explained, very illustrative and easy to go through.»
After today we will be working together with Priscilla on making some more code in JavaScript while working with sound. Honestly, going back to coding is not really exciting since I’m not really good at it and it often gives me more headaches than I’m used to. Still, I’m positive this will be a good start, refreshing my mind on what JavaScript works like on a simple project should not be as stressful as other programming classes were.
Sep 1, 2020

